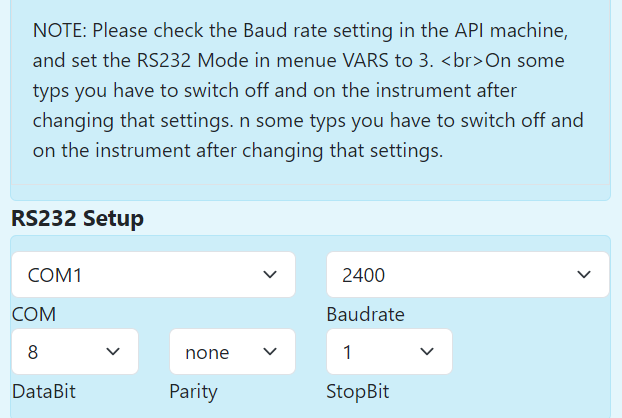
On the left side, you can see the devices, and on the right side, the individual parameters. Before beginning any configuration, ensure that the baud rate settings are identical to the device and verify which port the device is connected to. Important: Always take note of the information under ‘Note’ and follow the instructions accordingly. For Ethernet devices, you need to provide the URL and specify which port is being used.
Devices and parameters can be set to ‘passive’. In this mode, settings do not change, and data is simply not collected. You can also indicate whether the device is calibrated or not. Calibration serves as a functional check.
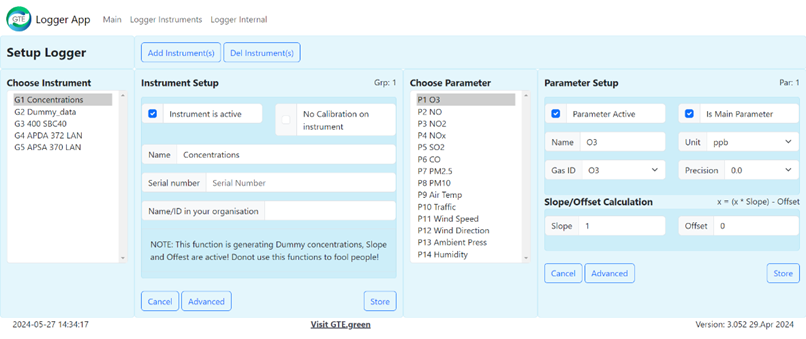
It is possible to enter the serial number and, if available, the internal company ID. This aids in easier orientation and organization.
When adding a new device, it is very likely that the default settings will be appropriate; if not, you will need to adjust them manually. For subsequent steps, we recommend opening the logger in a new window to directly observe the impact of your settings.
As mentioned earlier, individual parameters can be disabled. However, you can also designate them as ‘main parameters’, which will be highlighted in yellow and visible on the graph.
You can assign a name to the parameters, but it is more crucial to set the correct unit, which must match that of the device. If this does not work, the ‘Slope’ and ‘Offset’ fields allow for unit conversion. ‘Precision’ determines the number of decimal places displayed.
The logger can be configured to generate calibration data for the devices. The ‘Span Zero’ field is where the target value is entered, which the measurement will follow. This procedure is also recorded in the database.
There is a ‘Missing Indicator’, which is -9999 in this case. If you see this value, the parameter is missing.
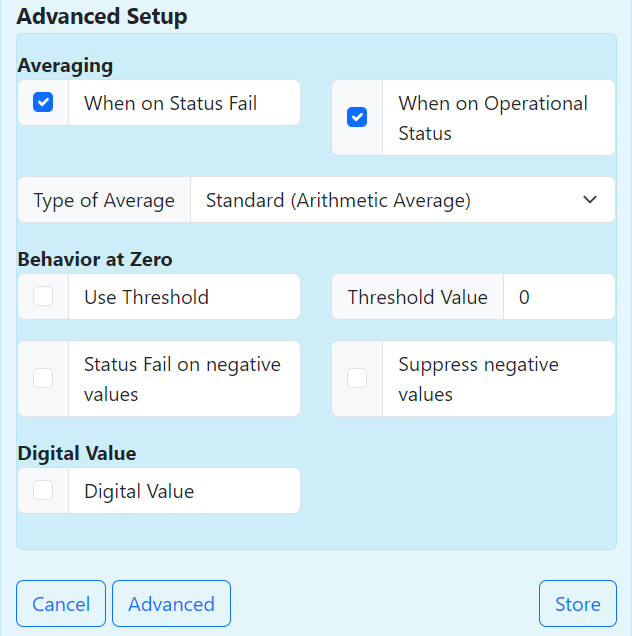
In addition to the standard settings, there are ‘Advanced’ settings. Under ‘Averaging’ you see ‘When on Status Fail/ When on operational Status’, in them values are recorded even in the event of an error message. This is typically not done for main values but should be enabled for secondary values.
The ‘Type of Averaging’ allows you to select the averaging method, usually the arithmetic mean.
‘Behavior at Zero’ specifies when a value is set to zero to avoid negative readings. Using ‘Use Threshold’, any value below the threshold is set to zero. Values are also not recorded in ‘Status Fail’ mode. In the worst-case scenario, you can suppress negative values using ‘Suppress Negative Value’, though using the threshold is the most reliable method.
The ‘Digital Value’ is for analog inputs. It is used to specify that it is a digital value, either 0 or 1. This follows the same principle as the threshold, where everything below a certain value is shown one way and everything above another. Values can also be inverted.
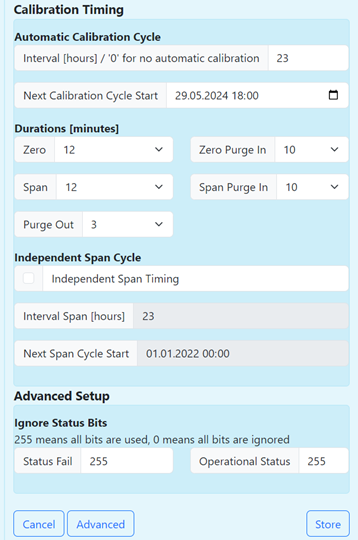
Moreover, devices also have ‘Advanced’ settings. For example, ‘Calibration Timing’ is an automatic functional check that typically occurs once daily. For this cycle, set the interval to 23 or 25 hours instead of 24, to avoid calibration always occurring at the same time, thus ensuring rotation. You can set the start of the cycle below this. To affect only one average value as much as possible, adjust the settings for ‘Zero’ and ‘Span’ to match the average value interval and factor in the ‘Purge Out’ time (half-hourly, hourly).
The goal is to keep ‘Zero’ and ‘Span’ as far apart as possible. To avoid using test gas for this, there is ‘Independent Span Timing’. It is important that it does not run simultaneously with ‘Calibration Timing’.
Lastly, you can also ignore status bits.